 08-14-2009, 12:26 PM
|
#21
|
|
GL Member
Join Date: Apr 2009
Location: Minnesota
Posts: 235
|
Thanks!
__________________
2K 3.4L 4DR GLS
|

|

|
 12-13-2009, 08:18 PM
|
#22
|
|
GX Member
Join Date: Dec 2009
Location: Las Vegas, Nevada
Posts: 142
|
I just bought an 01 alero last month and it came with the hazzard switch pushed in the dash as well. It still functions fine.. just gotta stick your finger in there and push it. Anyway, How the hell does that happen? You would have to push really hard to break it wouldnt you? Now that I read this I guess its common. Can anyone give me some tips on getting to it? Someone mentioned they would do a write up on it a few posts back. You get to it by removing the center vent right? How do I go about that? Pry around the edges until it pops out?
|

|

|
 04-26-2010, 06:00 PM
|
#23
|
|
GX Member
Join Date: Jan 2008
Location: Nepean
Posts: 8
|
Gonna have to say thank you as well, this has been driving me crazy cause I don't crank my stereo, not exactly the tempo count I was looking for in music
Oh, and I now win the argument with my girl about where the noise was coming from... BURN !! Haha
Cheers !!
Last edited by airrazor : 04-26-2010 at 06:03 PM.
Reason: Double Play... FTW
|

|

|
 04-26-2010, 06:39 PM
|
#24
|
|
Gone
Join Date: Mar 2004
Location: Lockport Ny
Posts: 19,244
|
airrazor, thanks for the bump. Mine just started doing this... i didn't even know we had a fix already for it. 
+1 thread zombie. It helped this time! |

|

|
 04-26-2010, 06:43 PM
|
#25
|
|
GL Member
Join Date: May 2008
Location: Dallas
Posts: 379
|
Ya couple years after I had the turn signals replaced it started doing that. I let it go even though it drove me mad and it just went away one day. Never looked at it.
__________________

MP Racing CAI, Pacesetter Exhaust, and PCM. High flow CAT. KYB GR2 struts. Canuck Motorsport Springs. Cross drilled rotors. Stern ST18 17" rims.
|

|

|
 07-14-2011, 03:56 AM
|
#26
|
|
GLS member
Join Date: Nov 2007
Location: Fort Knox area, KY
Posts: 2,120
|
Quote:
Originally Posted by bkathsalero

ATMOSPHERE: If it pushes into the dash remove the center vent, remove the hazard switch and replace the bracket that holds the hazard, I'll make a how to later as I have to do one on a gold alero at work today, had to wait a day for parts
|
Quote:
Originally Posted by bkathsalero

ok heres a little info to start off
the bracket the hazard switch sits in is gm part # 22627609
The hazard switch itself is gm part # 10359040
|
OR, if you just can't wait........
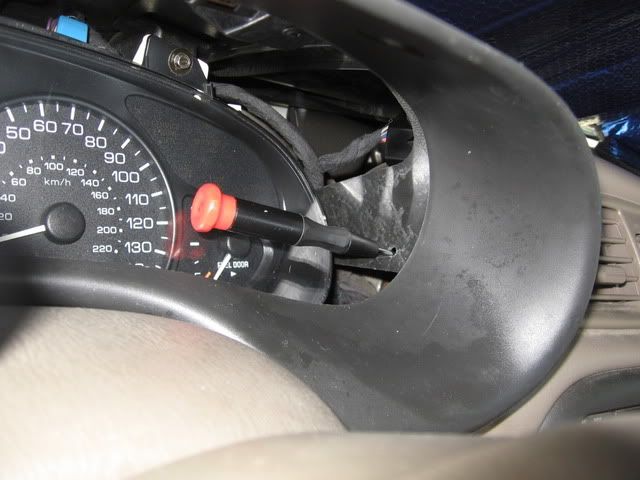
Drill a hole right Thar 

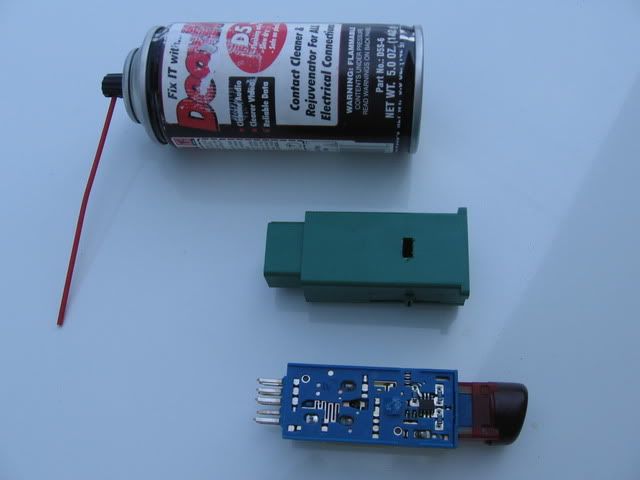
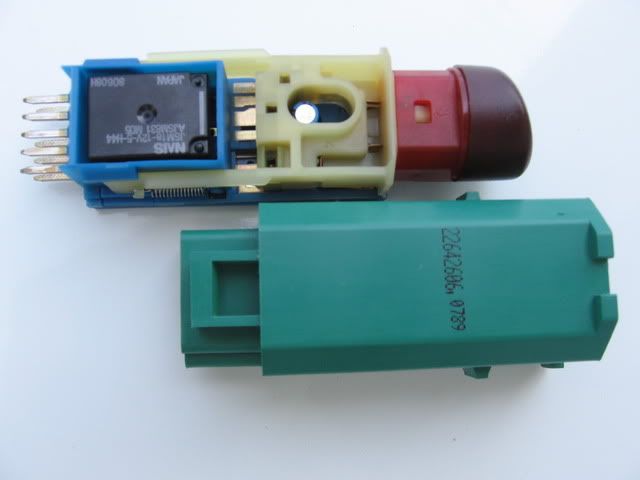
Then loop the appropriate sized cable tie thru it and around the harness plug behind the H-switch, and tighten securely. But before doing that, take your favorite contact cleaner and spray that sucker:


Then never use it again 
Last edited by AleroB888 : 07-14-2011 at 04:00 AM.
|

|

|
 10-03-2017, 06:55 PM
|
#27
|
|
GLS member
Join Date: Nov 2007
Location: Fort Knox area, KY
Posts: 2,120
|
Gotta replace the hazard switch, what's the trick to removing the center vent?
|

|

|
 10-03-2017, 07:29 PM
|
#28
|
|
GL Member
Join Date: Dec 2013
Location: Minnesota
Posts: 593
|
I actually cracked mine getting it out. I even removed the radio and the clips were still a pain to depress enough to remove it. There really is no trick. Just have to find the 2 metal spring tabs that hold the bottom in place and push th, upwards. You can replace it without removing the vent. Just remove your instrument cluster.
|

|

|
 09-05-2019, 04:57 PM
|
#29
|
|
GX Member
Join Date: Jan 2017
Location: Moundsville WV
Posts: 52
|
Quote:
Originally Posted by bkathsalero

We get these alot here at my work, even have a gold alero in today for what I'm guessing the problem is. (the owner pushed the hazard button so hard it pushed behind the dash and broke the bracket it sits in. But when one comes in we recommend a multi function switch and a hazard switch. Neither are hard to do. Remove center vent via to clips on the bottom side of vent, and then look left and up and a child could figure it out from there. For multi function switch, just remove steering column cover and you will see a tourx on the top side, romove that torx and wiggle mfs and it will pop loose, then remove the two connectors going into it, easy.. let me know if that didn't make sense
|
Do you happen to have a link or part number for the black plastic bracket that the hazard switch snaps into?
Sorry if it seems like I'm driving you crazy, as I emailed you as well.
Found the part number you posted earlier.
Last edited by mrbreezeet1 : 09-05-2019 at 07:20 PM.
|

|

|
 09-05-2019, 10:49 PM
|
#30
|
|
GX Member
Join Date: Jan 2017
Location: Moundsville WV
Posts: 52
|
gm part # 22627609 is the bracket Bracket they break sometimes.
The hazard switch itself is gm part # 10359040
|

|

|
|
Currently Active Users Viewing This Thread: 1 (0 members and 1 guests)
|
|
|
| Thread Tools |
Search this Thread |
|
|
|
| Display Modes |
 Linear Mode Linear Mode
|
 Posting Rules
|
You may not post new threads
You may not post replies
You may not post attachments
You may not edit your posts
HTML code is Off
|
|
|
All times are GMT -4. The time now is 12:29 PM.
|